Since the state of April I have been all psyched up over the fact that Spring is here. My favorite season, hands down its so spectacular. Yesterday I was looking out my window and in the sea of brown I have become used to looking at, I saw a patch of purple. I instantly jumped up ran outside and marveled at the first patch of flowers to bloom in my yard. I am always in shock that upon any moment with no assistance flowers bloom. I know it sounds silly but its so fascinating and cool to me. The flowers were purple Iris, that had glistening rain drops on them. Seeing the flowers made me even more ready and excited to finally start my garden for the season.
Last year, I had a small garden in my backyard of kale, strawberries, basil, tomatoes and lettuce. Its a lot of work keeping up a garden and I definitely failed on taking care of some of my crops. But this year I am ready to give it another shot and grow more then last year. I am also really excited to turn my tepee int a giant trellis for climber flowers and food. I love the idea of seeing my tepee all green with Peas, Morning Glories, Beans and Cardinal Climbers.
Today I decided to start an egg crate garden. I got the idea from Free People's Blog DIY section. I love their DIYs they are so creative and easy. I purchased an 18 crate of eggs, different seeds (flowers, food, herbs) I wanted to grow and seed starting mix. You can see my process below. It was a fun project that made me feel like I was in a third grade science class again. I also love the idea of starting seeds in egg shells I am really excited to see them grow!
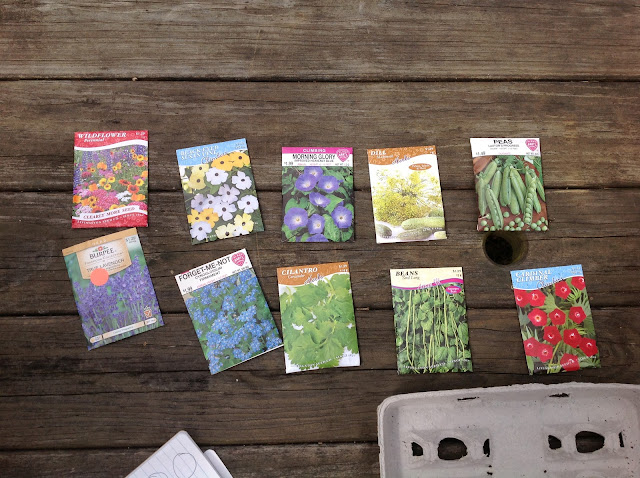
I decided to get a little bit of everything. Some flowers for beauty like the Wildflower Perennials, a couple of climbers for the tepee such as the Morning Glories, Asian Beans and Black-Eyed Susan Vines and some herbs like the True Lavender and Cilantro.
Free People explains how to do everything pretty well already but since your here... All you do is use a knife to crack off the top of the eggs, empty out the yoke then wash out the shell. Once you have finished doing them all, you put a spoon full of seedling starting mix in each egg, then sprinkle some seeds and cover with more soil mix.
See look how cute they are!
Then make sure to make a chart of which seeds are in which egg shell! I decided to get a little extra crafty and break out the color pencils and do a drawling of each of my future plants. Don't mind my glass of white wine no shame in keeping things classy while doing crafts.
The purple iris that started it all.
I decided to get a little bit of everything. Some flowers for beauty like the Wildflower Perennials, a couple of climbers for the tepee such as the Morning Glories, Asian Beans and Black-Eyed Susan Vines and some herbs like the True Lavender and Cilantro.
Free People explains how to do everything pretty well already but since your here... All you do is use a knife to crack off the top of the eggs, empty out the yoke then wash out the shell. Once you have finished doing them all, you put a spoon full of seedling starting mix in each egg, then sprinkle some seeds and cover with more soil mix.
See look how cute they are!
Then make sure to make a chart of which seeds are in which egg shell! I decided to get a little extra crafty and break out the color pencils and do a drawling of each of my future plants. Don't mind my glass of white wine no shame in keeping things classy while doing crafts.
Viola! My egg shell garden is complete. Now just have to give these babies sun, keep moist and time to grow. Go out and make your own its so fun, easy and therapeutic, I promise!
P.S. If you get the reference to the title of this post give yourself a pat on the back.


